Web Email
Webmail allows you to remotely administer your email account without having to set up an account on a local computer.
Unconfusing Webmail Tutorial
The following steps will walk you through how to use your Unconfusing Webmail to access your email from anywhere. Just follow the instructions below the picture.
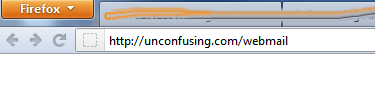
1. Navigate to http://yourdomain.com/webmail.
2. Type your FULL EMAIL address and password.
3. Click login.
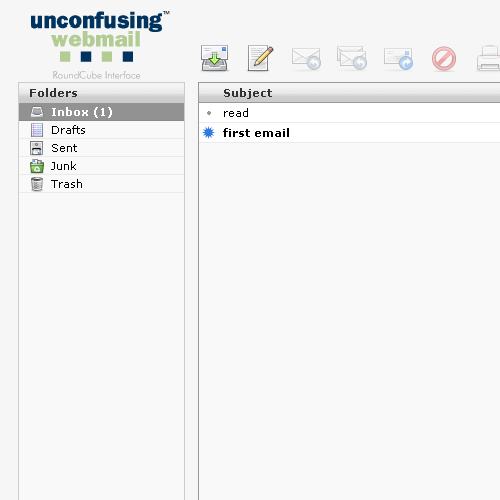
This is your email management screen. You can create auto-responders when you're not going to be accessing email for a while or forward your email to another account. You can also change your password and (obviously) access your webmail.
Choose Roundcube to continue with this Tutorial.
The rest of this tutorial will focus on using the Roundcube Webmail system.
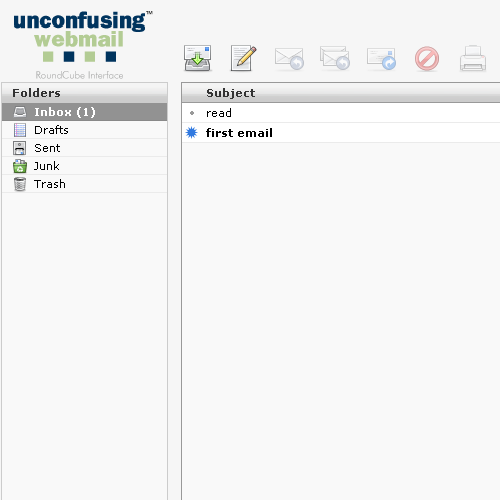
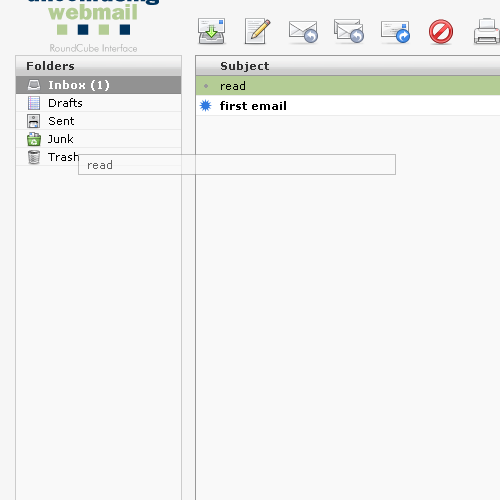
4. You should see your emails in the main pane. Controls are at the top, folders to the left.
5. Click any email to highlight it and activate actions on the toolbar.
6. Navigate to another folder by clicking on its name or icon.
All of your new emails are highlighted in bold, also showing the number of new emails beside each folder.
Emails can be highlighted with one click. You may also navigate just like you can in Windows, using the arrow keys, enter, shift, and control (to highlight multiple emails).
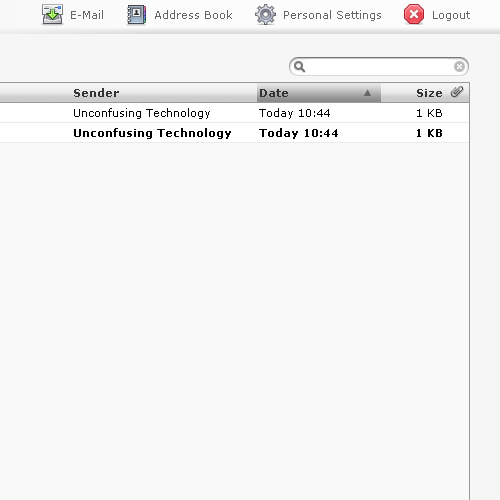
7. Change the way emails are sorted by clicking on the category. Notice the arrows change based on whether the column is Ascending or Descending.
8. You can also use the search box here to find an email. Type what you're looking for and press enter.
This is the top right portion of your screen.
Here you will find ways to locate specific emails and change your account settings. You will come here to logout and change your personalized settings (such as your signature or timezone).
9. If you want to select multiple emails, use the controls here or the SHIFT and CONTROL keys, just like in Windows.
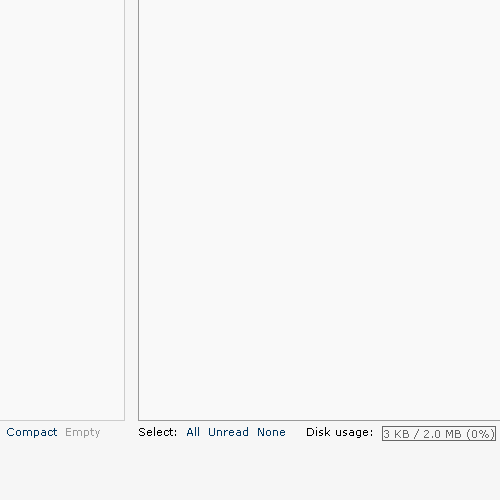
This is found at the bottom of your screen.
You are also notified here of your quota and how close you are to reaching it. Be sure to delete old emails to prevent losing emails in the future!
10. Highlight a message and drag and drop it in another folder to move it.
Dragging and dropping, a common computer task, is accepted in this interface. You can see how the interface displays a portion of your email as you are dragging it.
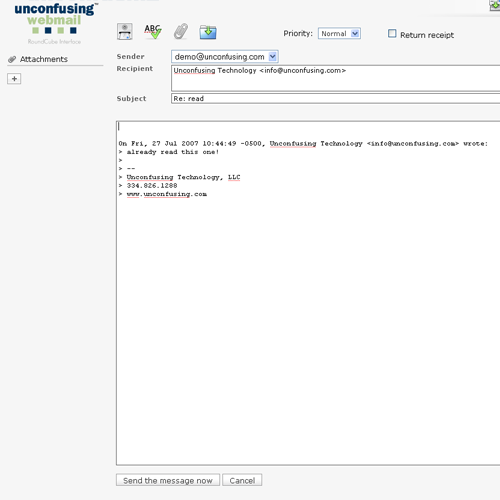
11. Once you have entered a message (by double-clicking, creation of a new message, or responding), a new menu is activated.
12. Type the message components just as you would a normal email.
13. Attach a file to this message on the left. Click the plus sign for an upload dialog.
14. A SEND button is at the bottom or at the top left of the toolbar.
Use the back button to get back to your messages. You should be taken there immediately after sending the message.